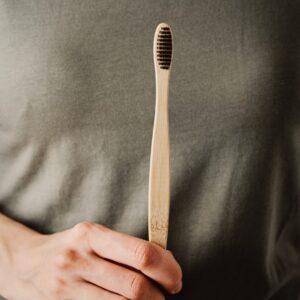
Learn how to make a sustainable toothbrush holder at home.
Feeling crafty? This post provides a step-by-step guide to making your own eco-friendly toothbrush holder, perfect for your bamboo toothbrush.
Crafting Your Own Toothbrush Holder
Are you tired of cluttered bathroom counters or uninspiring store-bought toothbrush holders? Why not try your hand at crafting your very own? A DIY toothbrush holder is not only a practical solution but also a fun and creative way to add a personal touch to your bathroom. Plus, it’s a great project for beginners and seasoned crafters alike! In this article, we’ll walk you through some simple and imaginative ideas to create a custom toothbrush holder that’s functional and stylish.
Why Make Your Own Toothbrush Holder?
Before we dive into the how-to, let’s explore the why. Creating your own toothbrush holder comes with several benefits:
- Personalization: You can design it to match your bathroom’s theme or your personal style.
- Sustainability: Use recycled or eco-friendly materials to reduce waste.
- Cost-Effective: Save money by repurposing items you already have at home.
- Fun and Creative: It’s a satisfying project that lets you unleash your creativity.
Now that you’re convinced, let’s get started!
Materials You’ll Need
The materials will vary depending on the type of toothbrush holder you want to create, but here are some common items you might need:
- Mason jars, tin cans, or small glass jars
- Paints (acrylic or spray paint)
- Paintbrushes or sponges
- Hot glue gun and glue sticks
- Decorative items like washi tape, stickers, or ribbons
- Drill (if working with wood or metal)
- Sandpaper (for smoothing surfaces)
- Polymer clay (for sculpted designs)
- Waterproof sealant (to protect your creation from moisture)
Ideas for DIY Toothbrush Holders
1. Rustic Mason Jar Holder
Mason jars are a versatile crafting staple, and they make excellent toothbrush holders! Here’s how:
- Clean the jar: Wash and dry it thoroughly.
- Paint it: Use acrylic paint or spray paint to give it a pop of color or a rustic matte finish. For a farmhouse vibe, try chalk paint in soft pastel shades.
- Add dividers (optional): If you want separate slots for each toothbrush, use hot glue to attach small wooden dowels or plastic dividers inside the jar.
- Decorate: Wrap twine around the neck of the jar, add a bow, or stick on some stencils for added charm.
Place your finished masterpiece on the bathroom counter or mount it on the wall with a metal bracket for a unique look!
2. Upcycled Tin Can Holder
Don’t toss those empty soup cans! With a little creativity, they can become trendy toothbrush holders.
- Prepare the can: Remove the label and smooth any sharp edges with sandpaper.
- Paint and decorate: Spray paint the can in your favorite color, then add patterns with stencils or washi tape. You can even decoupage it with decorative paper for a vintage feel.
- Seal it: Apply a waterproof sealant to protect your design from water splashes.
These tin can holders are lightweight and perfect for kids’ bathrooms, as they can be customized with fun designs like superheroes or cartoon characters!
3. Wooden Block Holder
For those who prefer a minimalist aesthetic, a wooden toothbrush holder is an elegant option.
- Choose the wood: Find a small block of wood that’s untreated and smooth. Sand it down if needed.
- Drill holes: Use a drill to create holes in the block where the toothbrushes will stand upright. Make sure the holes are wide enough for the toothbrush handles but not too loose.
- Finish it: Apply a waterproof wood stain or varnish to protect it from moisture. You can leave it natural for a rustic look or paint it to match your décor.
This design is sleek, durable, and perfect for modern bathrooms!
4. Clay Creations
If you love working with your hands, try sculpting a toothbrush holder out of polymer clay!
- Shape your design: Roll out the clay and mold it into your desired shape—a cup, an animal figurine, or even a quirky abstract design.
- Add slots: Create holes or grooves in the clay to hold toothbrushes securely.
- Bake it: Follow the instructions on your polymer clay packaging to harden your creation in the oven.
- Paint and seal: Once cooled, paint it with acrylics and apply a waterproof sealant for durability.
This method allows for endless customization and is perfect for unleashing your artistic side!
5. Hanging Toothbrush Organizer
If counter space is limited, consider making a wall-mounted toothbrush holder using recycled materials like old picture frames or fabric pockets.
- Frame it: Repurpose an old frame by adding hooks or small clips along the bottom edge to hang toothbrushes vertically.
- Pocket organizer: Sew small pockets onto a piece of fabric and attach it to the wall using adhesive hooks or nails. Each pocket can hold one toothbrush and even a tube of toothpaste!
These space-saving solutions are great for small bathrooms or shared spaces where organization is key.
Tips for Success
- Keep hygiene in mind: Make sure all materials are clean and safe for use in a bathroom environment. Avoid porous materials that may harbor bacteria unless they’re sealed properly.
- Use waterproof finishes: Bathrooms are humid spaces, so ensure your creation is protected against moisture to maintain its durability over time.
- Think outside the box: Don’t limit yourself to traditional designs—experiment with colors, patterns, and shapes to make something truly unique!
Final Thoughts
Crafting your own toothbrush holder is an enjoyable project that adds personality and functionality to your bathroom space. Whether you choose to upcycle household items or create something entirely from scratch, the end result will be a reflection of your creativity and style.
So grab your crafting supplies, roll up your sleeves, and get started! Who knew organizing toothbrushes could be this much fun? Happy crafting!


