Creamy Homemade Vegan Butter
Creamy Homemade Vegan Butter: A Delightful DIY in a Coconut Bowl
In the quest for delicious plant-based alternatives, homemade vegan butter stands out as a creamy, versatile option that can easily replace traditional butter in your kitchen. Not only is it simple to make, but it also allows you to control the ingredients, ensuring a healthy and flavorful spread. Plus, serving it in an eco-friendly coconut bowl adds a touch of natural elegance to your table setting.
Why Choose Vegan Butter?
Vegan butter is a fantastic alternative for those looking to reduce their dairy intake or embrace a plant-based lifestyle. It’s free from cholesterol and often lower in saturated fats compared to traditional butter. Moreover, making your own vegan butter means you can avoid preservatives and artificial additives commonly found in store-bought versions.
Ingredients for Creamy Vegan Butter
Creating your own vegan butter at home requires just a few simple ingredients, many of which you may already have in your pantry:
– **1 cup of refined coconut oil**: This provides the base and solid structure for your butter. Refined coconut oil is preferred for its neutral flavor.
– **1/4 cup of extra virgin olive oil**: Adds a smooth texture and rich taste.
– **1/4 cup of unsweetened almond milk**: Acts as a creamy liquid component.
– **1 tablespoon of apple cider vinegar**: Gives a slight tang, mimicking the taste of cultured butter.
– **1/2 teaspoon of turmeric**: For a natural yellow color.
– **1/2 teaspoon of sea salt**: Enhances the overall flavor.
– **Optional: 1 teaspoon of nutritional yeast**: Adds a cheesy, umami flavor.
Step-by-Step Preparation
Step 1: Melt the Coconut Oil
Begin by gently melting the refined coconut oil in a saucepan over low heat. You want it just melted, not hot, to ensure it blends well with the other ingredients.
Step 2: Blend the Ingredients
In a blender or food processor, combine the melted coconut oil, olive oil, almond milk, apple cider vinegar, turmeric, sea salt, and nutritional yeast (if using). Blend on high speed for about 30 seconds until the mixture is smooth and creamy.
Step 3: Pour into a Coconut Bowl
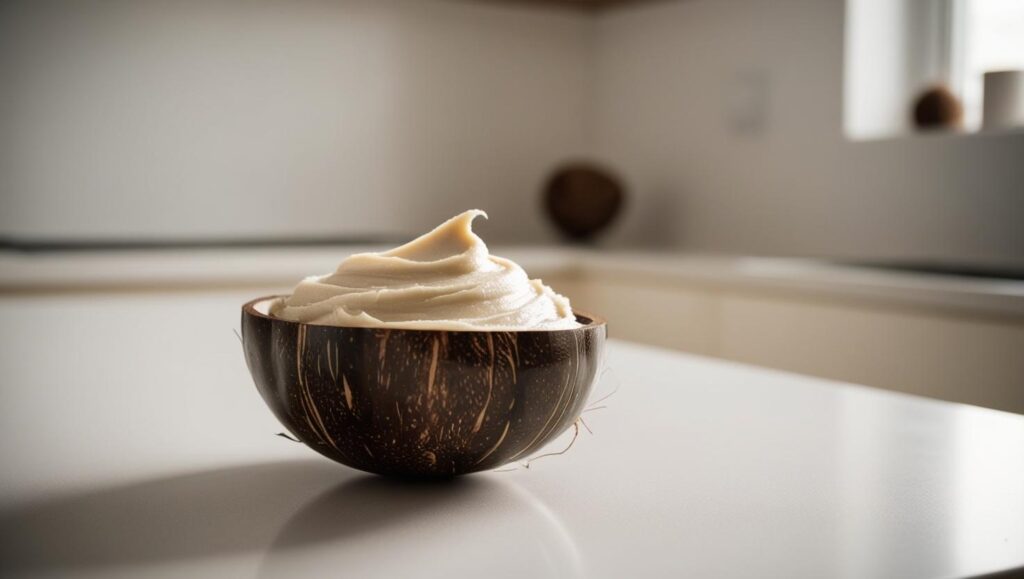
Transfer your creamy mixture into a beautiful coconut bowl. Using a coconut bowl not only enhances the presentation but also aligns with sustainable living practices. It’s a great way to reduce plastic use and add a rustic charm to your kitchen.
Step 4: Chill Until Set
Place the coconut bowl in the refrigerator and allow the vegan butter to set for at least 2 hours. Once solidified, it will have a creamy, spreadable consistency perfect for all your culinary needs.
Enjoying Your Vegan Butter
Your homemade vegan butter is now ready to be enjoyed! Use it as a spread on toast, a base for sautéing vegetables, or a luscious addition to baked goods. Its creamy texture and mild flavor make it incredibly versatile.
Tips for Storage
– Keep your vegan butter refrigerated in the coconut bowl, covered with a lid or wrap, to maintain freshness.
– It can last up to two weeks in the fridge, but you’ll likely find yourself reaching for it frequently!
### Customizing Your Butter
Feel free to experiment with different flavors by adding herbs like rosemary or thyme for a savory twist, or a touch of maple syrup for a hint of sweetness. The possibilities are endless!
Making creamy homemade vegan butter is a rewarding and straightforward process that brings the joy of cooking back to basics. By using a coconut bowl, you’re not only creating a delicious spread but also embracing a more sustainable lifestyle. Enjoy the rich flavors and health benefits of this plant-based alternative, and let it become a staple in your kitchen.
Whether you’re vegan or simply looking to try something new, this homemade butter will delight your taste buds and impress your guests. Happy butter-making!
—
This blog post offers a comprehensive guide to making vegan butter at home, emphasizing the use of natural and eco-friendly materials like coconut bowls. Enjoy your culinary adventure in plant-based cooking!
Creamy Homemade Vegan Butter
Course:
Prep Time:
Cook Time:
Total Time:
Servings:
Ingredients
-
()
Instructions
-
()


